Import your footage into After Effects and create a new composition.
Make sure the Tracker is visible, this can be activated by going to Window - Tracker, and the panel should pop up in the bottom left corner.
Step 2)
It is IMPORTANT to shoot for tracking by placing tracking markers on whatever is going to be stable in the scene or it's going to be a huge pain. Because I'm a glutton for punishment, the shot I'm tracking has no markers in it, so you'll see me tracking features of the shot. Using this method will take a LOT more work.
Step 3)
On your Tracker window click the Track Motion button and Check ON the Rotation (Position will be on by default) and leave the Scale off.
Step 4)
Adjust your tracking points to your tracking markers or, if you are like me and don't have those, points in the shot that never leave.
Step 5)
Analyze Forward through your shot to see how well it tracks your points. If it flies off the rails, dive in and manually fix it up.
Step 6)
Create a Null (Layer- New- Null).
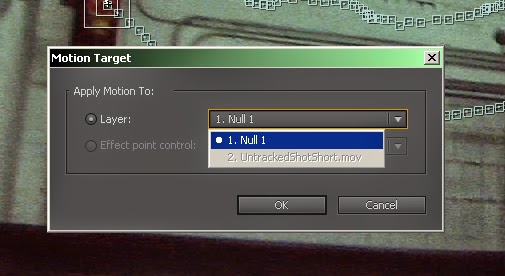
On your Tracker tab, click the Edit Target button and identify (on the Motion Target window that will pop up) that you want the target to be your new Null.
Step 7)
On your Tracker tab, click the Apply button and then OK on the following popup window.
Step 8)
Whatever you are tracking into the scene (in my case text), you'll change the Parent of that layer to point to your Null.
Hooray! You've done it!


No comments:
Post a Comment